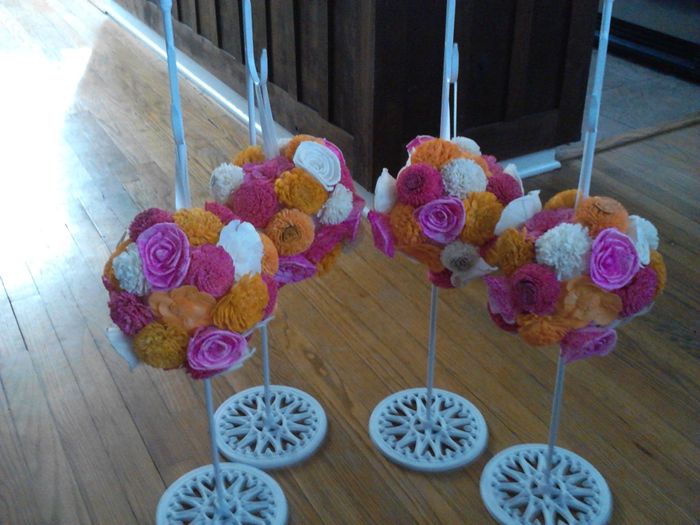


So in a post about a week ago I showed off sola flowers that I had dyed. We finally finished dying all of our sola flowers both pink and orange and we left some the natural cream color. Last night I began to assemble the pomanders. Have 4 done, with 8 left to go! Each one takes about 45 minutes to complete to allow the hot glue to set in place before moving onto the next flower. I will be adding a butterfly or two to each of the pomanders once they are all finished. What do you all think?